UEd2.1 Help:Getting Started Tutorial
| Getting Started Tutorial | |
|---|---|
| Topic | Mapping |
| Series | UEd2.1 Help |
This tutorial will teach you how to create your first basic map, with a few rooms, some monsters, a couple of weapons and some interactive elements. This should get you started with map making and help you understand all the basics discussed in other topics.
Conception
First things first
Before creating a map, especially a multiplayer map, the usual piece of advice given to designers is to have a clear idea of what you want to come up with. It wouldn't do to start a medieval castle before suddenly deciding that a Sci-Fi spacecraft would actually be more appropriate. Some make complete blueprints, with the shape and size of each room, on paper, and then proceed to create what they have planned. Some simply get a general idea of what they want and build on this idea until they are satisfied.
In multiplayer maps, the importance of balancing the map and creating interesting situations with enough options for each players more or less forces the designer to have a good idea of the floorplan of the map before even starting. In singleplayer gameplay, it is easier to just go with the flow and add zones as you go, but it will more than often lead to linear and unsurprising gameplay, with rooms coming one after the other. A good singleplayer map lets you come back to some places but in a different way. For example, you could enter a valley and explore a village under a huge rocky arch, and latter come back to this place walking on the huge arch to go to a temple at the top of the mountains.
For our first, basic and singleplayer map, we will limit ourselves to a few medieval rooms with a couple of monsters and a nali priest whose role will be to show us a hidden weapon.
Because a singleplayer map needs to have an atmosphere and feeling, it's often best to use realistic dispositions and settings, while you can create a real maze for a multiplayer map, as the gameplay is much more important than look. Our singleplayer map needs something to make it interesting, realistic and unique.
Here is our general guideline: the player starts locked in an underground dungeon. A Nali Priest sets him free him by opening the cell. Picking up a weak Dispersion pistol, the player shoots at a wall and triggers a secret door hiding another, more powerful weapon, but also warning two kralls.
General Architecture
Ask yourself what you see when thinking "Medieval Prison"? Stones, iron, dirty grounds and a decent dose of bloodthirsty guards all spring in my imagination. This is the feeling we want to create. Now, what about architecture? We will surely have some archs on the celing, walls of wood and stone and some mettalic elements here and there. The general feeling must be damp and dark. These are the elements we will use when decorating our rooms.
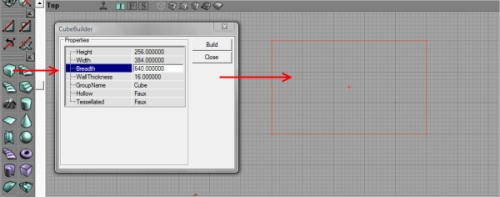
First, let's create a big room. All the cells will have a large opening on this room with iron doors and bars. Create a room with a height of 256, a width of 384 and a breadth of 640, then hit the subtract button :
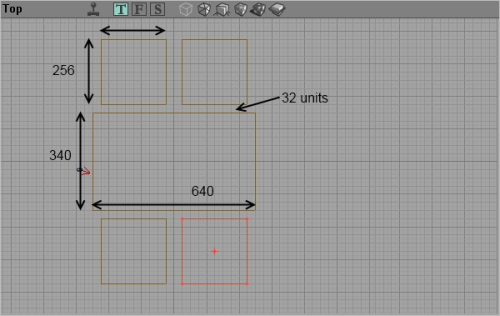
Now, let's create the cells. Create a 256*256 cube (128 units high), and subtract it several times intuil you have this (the grid is set on 16).
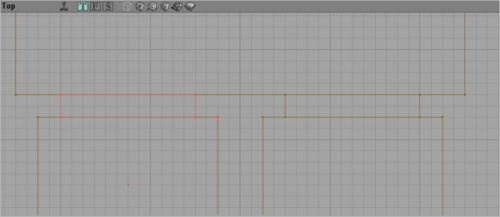
Now, to create the doorways between each cells and the main room, use the Vertex Editing tool to modify the Active brush so that it is 64 units less lon than a cell and only 32 units width. Once this is done, subtract it between the main room and each cell.Remembet that 3d units equals two squares if the grid is set on 16.
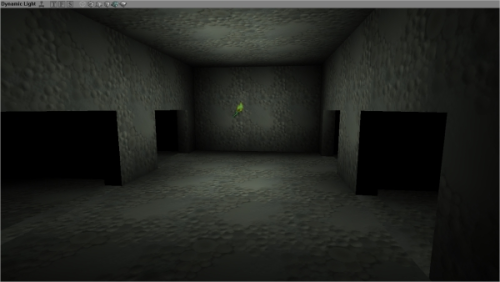
Once this is done for each cell, add a light (RMB=>Add a light here) and rebuild all.
Texturing
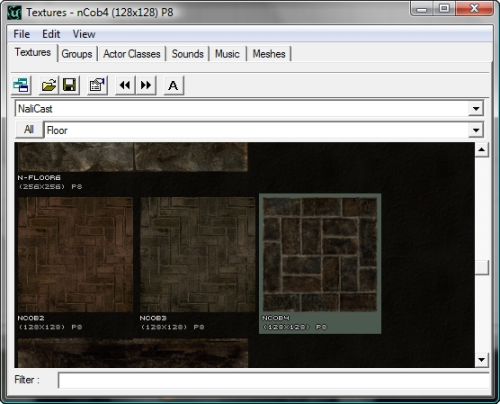
The default texture, with its silly bubbles, is rather dull and isn't helpful in trying to imagine the final look of the map. Open the Texture Browser and open the NaliCast package. Select a texture for the ground.
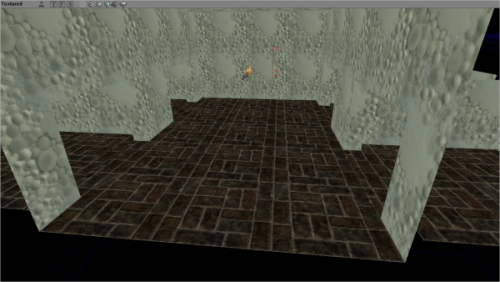
Holding CTRL down, click on each floor surface successively. This will allow you to select multiple surfaces instead of dealing with only one at the time. Once you have all the floors selected, right-click on any of them and select "Apply texture xxx".
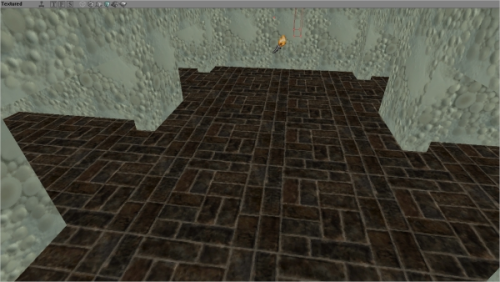
As you can see, teaxtures are not properly aligned. You can see the limite of each individual surface as there is a break there. To correct this on horizontal surfaces, select all yours surfaces by cliking on one and pressing SHIFT+F (select all adjacent floors and ceilings). Right-click on any of them and select "open texture properties". In the Alignement tab, click on Align to Floor. This will realign all horizontal textures automatically.
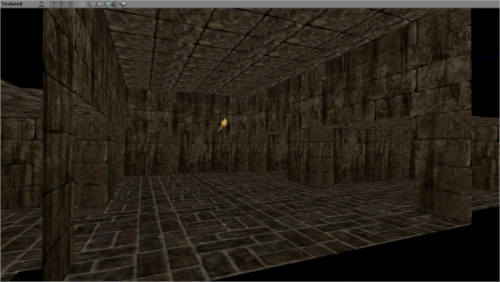
Select appropriate textues for the walls and ceilings and apply them to the proper surfaces.
This is the basic shape of our prison. Now, we will also need somewhere to put the hidden weapon. In the right end of the room, subtract a small 96*96*96 cube and give it the same textures as the rest of the big room :
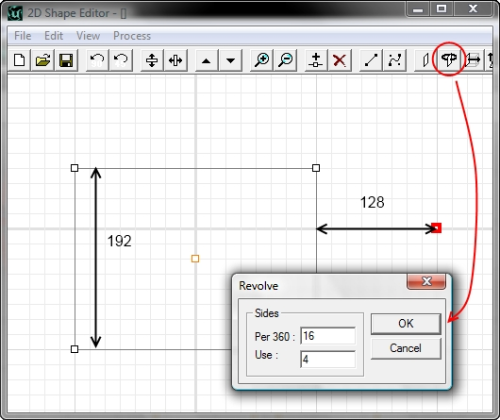
Now, at the left end of the room, we want a curved corridor. This is where the Kralls will come from. Because we want it curved, we will use the 2D Shape editor, but a simple square shape will be enough. Open the 2DShape Editor and create a 256*192 shape, with its pivot 128 units away on its right. 192 is equal to one and a half large square in the editor if the grid is set to 16, and 128 to one full square. Once this is done, hit the "revolve" button. We would like the corridor to be a 90° angle. Put 16 in "per 360", and in "Used", put one fourth of this number :
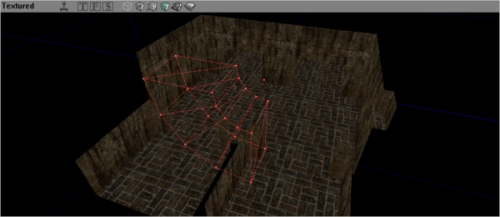
Back to UnrealEd, the Active brush should be at a bad angle :
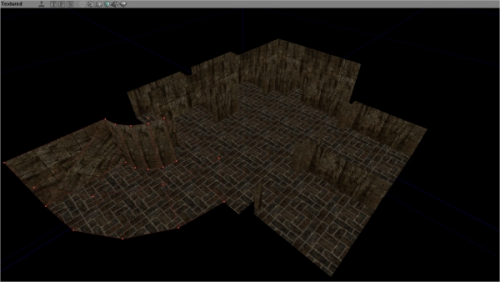
In the "Side" Viewport, hold CTRL down, and, with the Active brush selected, right-click and move the mouse until the brush is in the desired position. Once this is done, subtract it at the left hand of the room :
We now have the basic geometry of the level. We will now try to make it look a little nicer (though still gritty enough) by adding decorations.
Decoration
In the previous chapter, we have created the basic skeleton of the map. In this perspective, we have created a few empty rooms made of large, blank cubes with no actors and only a simple light in order to test the general volumes and layout of the map. Ths result, this bunch of empty cubic rooms is what is called a "layout". In UnrealEd jargon, this is the first step of map-making. If you want to change rooms, completely revise the theme of the map, add new doors and corridors here and there, you'd better do it at this stage, as it will then become increasingly hard to integrate new ideas and new rooms, as the general architecture of the map will become a lot more complex, and thus make it less likely for new additions to successfully blend in with old and well-planned part of the level.
Decorating
Apart from the stony textures, the map doesn't look like a jail at all for now. To create a good atmosphere, we need to add architecture gimmicks which will tell the player that he is in a medieval prison. The next stage will be lighting, and then adding the events, scripts and NPCs of the level to make it lively.
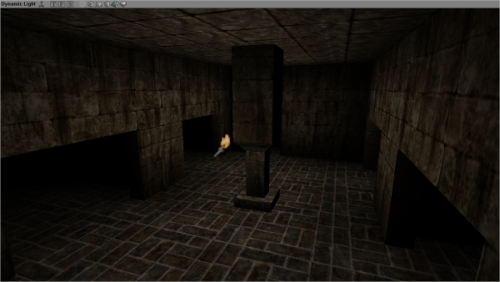
First, we need to decorate the great room. Adding a few cubes in the middle of it, I created a solid pillar 64 units wide at its top :
This breaks the perspective and thus cancels the feeling of emptiness. But to have a better effect, we should add thigs to the ceiling.
Most of the time, ceilings will be the largest flat surfaces of your map, as you don't need stairs and items on it. Flat ceilings are really boring to look at, and a good architecture always uses these large volumes were you don't have to worry about gameplay for artistic shows. Here, we wills imply add a few arches. Arches are a very nice touch and, if done well, can easily make your map pretty.
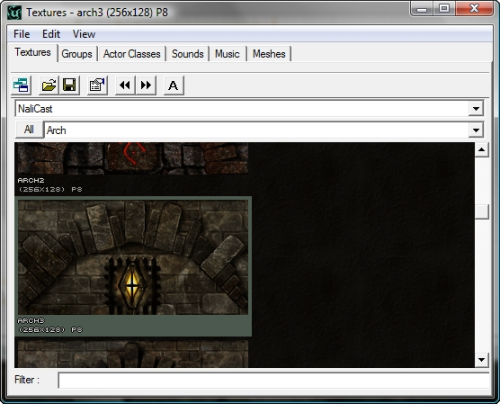
In the NaliCast package is an "Arch" group. It containes a few arches. Let's take this one for instance :
Select it and in the 2D Shape Editor, create a brush for the upper part of the texture. Then, extrude it as a 64 wide brush. In UnrealEd, it should come out out of proportions with the rest of the map.
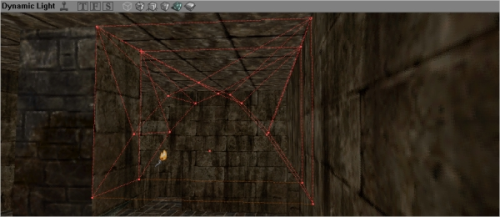
to adjust it, rotate it until it lies in the good position. It should go much too far :
To adjust it, we are going to use the Snapped Brush Scaling tool. First, right-click on one of the extreme vertices of the brush. This will move the pivot of the shape to this place, something important for us since scaling tools in UnrealEd always use the pivot as the point of reference for the whole brush. With the Snapped Brush Scaling Tool selected, hold CTRL and the RMB down and move the mouse until the brush fits perfectly into the room :
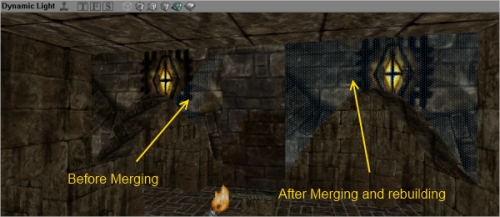
Add it. You will notice the texturinf of the brush is absolutely awful and doesn't fit at all. Select all the faces on one side of the arch and hit RMB=> Align Selected=> Align to wall around X axis. Repeat for the other side. Now, each side of the arch being constituted of several coplanar faces, we would like to blend them all in one face. To do this, once all the textures one both sides have been aligned, in a 2D Viewport, select the brush and hit RMB=> Polygons=> Merge. Rebuild geometry and select one of the surfaces :
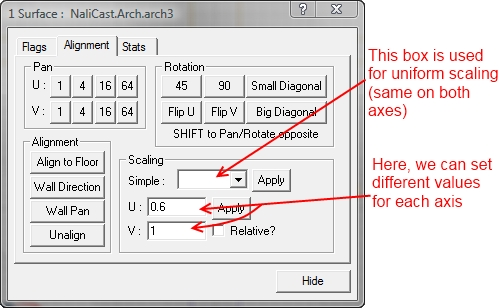
In my case, the textures are still horribly wrong: first, they are too large for the brush. Moreover, they are upside down. The second point can be easily canceled in the surface properties, in the alignment tab, by hitting Rotation=> 90 twice. Scaling is a little bit more complicated. It seems the height of the texture is good, but that its width is greater than the brush. To correct this, in the Scaling bow of the Surface Properties, we will set values for each of the two axes:
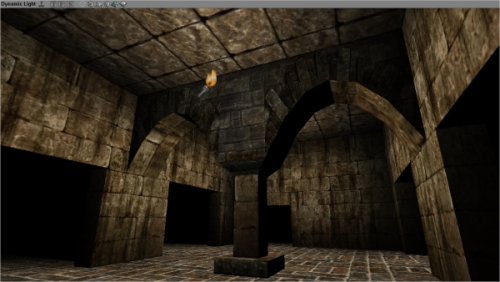
In my case, the texture has the good V size (horizontal), but its vertical (U) size is almost twice two large, so I set 0.6. The result is good. Select the arch and hit CTRL+W (duplicate), and move the copy on the other side. In my case, the texture on the pillar was not adapted to the archs, so I changed it a bit :
This is a good starting point. It's starting to look good. Now let's move to the prison themselves. We want some iron bars and an iron door. First, let's add the bars. Create a 128 units high, 96 units wide and 32 units broad brush. Be cause we modified the porportions of the Active brush for the arch, the same deformation is applied to the current shape, so right-click on the active brush and hit Reset=> All. Now, add the block in the doorway of one of the cells. It will serve as a placeholder for the real door.
The bars themselves can be done easily around it :
Once this is done, select all the brushes by pressing AltGr and drawing a selection frame around the brushes with the mouse. Duplicate them (CTRL+W). Move on to each cell.
Let's call it a day and move to part 3, where you will learn how to create real doors and movers.
Movers
Now that your map is not just an empty bunch of square boxes anymore, it's time to give it life with a few interactive brushes. First, the doors will have to be set, and then we will think about this hidden weapon we want in the wall.
Let's begin by deleting the foor placeholder brushes we had created for the cells.
Movers
We have seen that the fake doors were 128*96*32 blocks and fitted entirely inside the doorway. We will use the same width and height (after all, we want the door to completely seal the entry), but a little less broad. Create a brush that is 128*96*16.
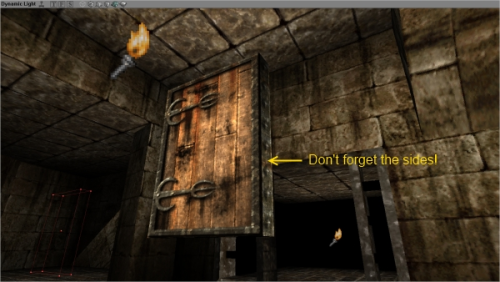
Add it and texture it properly, using the scaling box we have seen on part 2. There are some door textures in the "door" group of the NaliCast package (how imaginative). Don't simply texture the broad side of the door, but also the sides. To do this, move the brush and rebuild geometry:
Once this is done, we have to transfer all the informations of the brush to the Active Brush to make a mover out of it. There are two ways to do this. The first one is two create an Active brush that is larger than the brush and intersect it. This is useful when your mover is made of several brushes. But since we only have one, it is easier to simply right-click on the brush in the 2D Viewports and hit Polygons=> To brush.
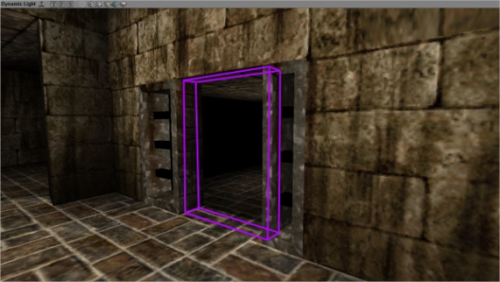
You can now delete the additive brush you have used and lick on the Add Mover button. A purple shape will be created with its surfaces invisible.
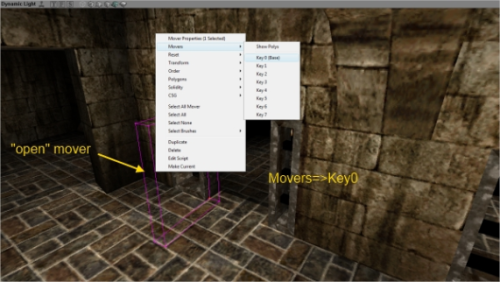
Now the door is ready, but we need to define its keys. Right-click on the mover and choose Mover=> Key1. If the pivot is not placed on one of the corners of the door, right-click on one of its vertices. Then, rotate the door in the Open position and hit RMB=> Movers=> Key0. The door will come back to its original position.
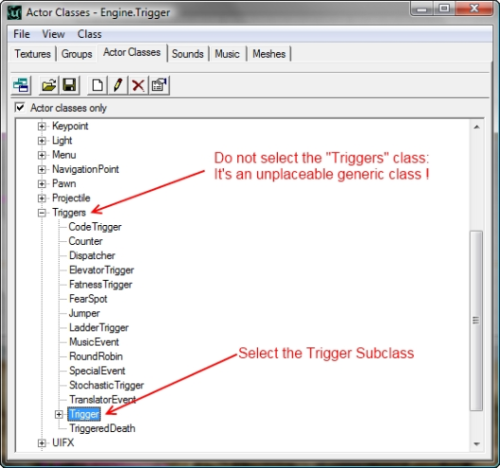
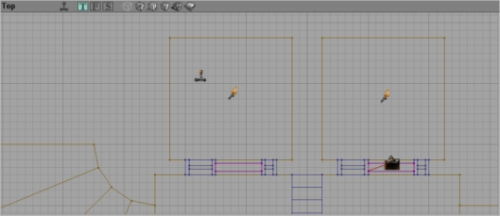
The movement is now programmed into the door. We now need a trigger with a radius. When the player walks into this radius, the event of the trigger is sent and the mover with the matching tag will open. The Trigger actor can be found in the actor browser, under Actor=> Triggers=> Trigger.
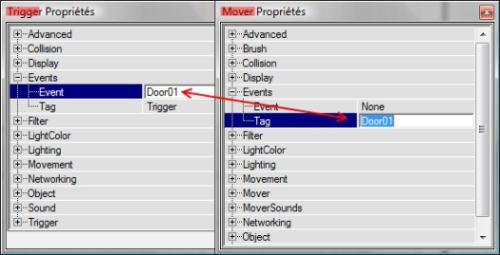
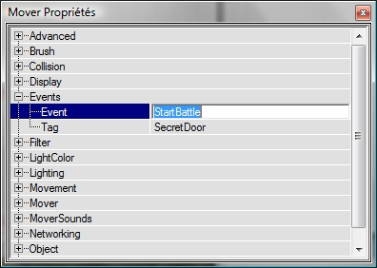
Add the trigger in the middle of the door. Its default behaviour is to send an event as soon as someone walks into its radius, which is fine for us. Simply set an event in its properties=> Events=> Event. Set the same thing in the Tag of the door itself :
You should see a red line between the trigger and the mover's pivot: this is the Event Line.
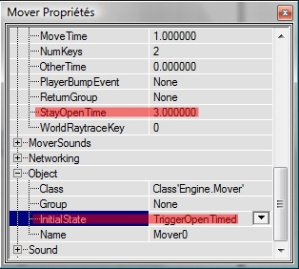
If you add a playerstart and play the map, you will notice that nothing happens when you walk into the trigger's radius. This happens because we haven't set a correct Initial State for the Mover. The list of InitialState can be found on the topic related to movers. In our map, the door will open for three seconds as soon as someone walks into its radius. After this time is elapsed, the door will go back to its close position, so we want to use a TriggerOpenTimed InitialState. In the Mover's properties, set StayOpenTime to 3.
I also suggest that you set bDynamicLightMover to true. More importantly, set MoverEncroachType to IgnoreWhenEncroach, as the door will open by pushing the player away.
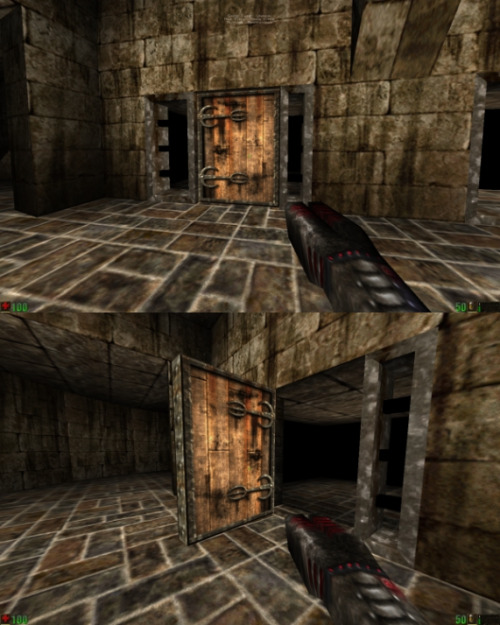
You may now test the map.
Since this is functionnal, you can simply duplicate the trigger and the door and move them to the other cells. Just make sure you change the event of the trigger and tag of the mover for each one.
Life and Creatures
Now that the main part of the level is done, we will add the nali priest, the weapon, and the events needed for him to come and open the player's cell and open the secret door that hides the weapon. Tadaa !
Animations and life
First, add a playsertsart in one of the cells (which one you choose is irrelevant). At the moment, the player can walk out of his cell as soon as he wants, so let's delete the trigger.
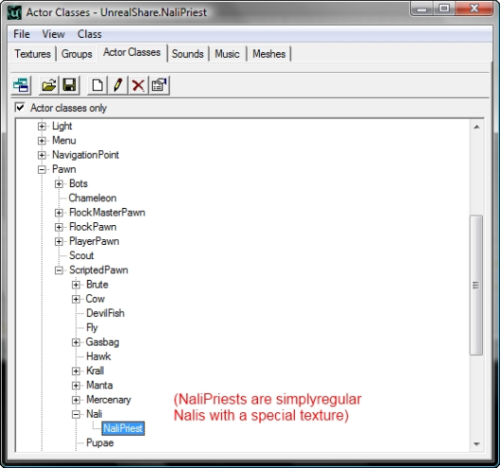
Now, let's add the Nali. Open the Actor browser and select Pawn=> ScriptedPawn=> Nali=> NaliPriest:
Add one in the cell where the player starts.
How to have him to open the door for the player to step outside? We will use AlarmPoints.
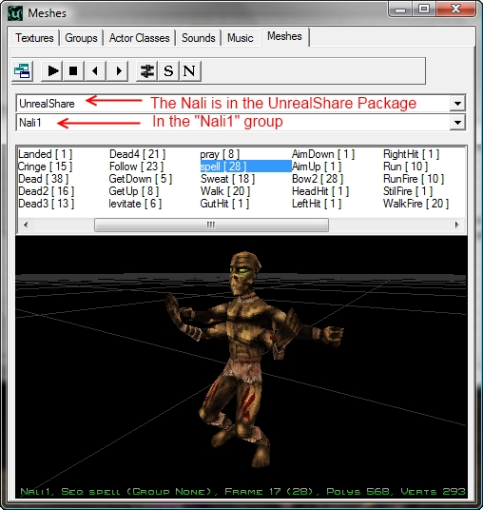
Add an AlarmPoint near the door, inside the cell where the player and the NaliPriest are. In its properties, give it a distinctive tag, like "FirstPoint". Because we want the nali to play some animation when he reaches the door (to show he's opening it), let's open the mesh Browser. The "spell" animation looks nice: maybe Nalis have some magic powers they can use to open doors.
In the AlarmPoint's properties, set AlarmAnim to "spell". Also set pausetime to 3.
The AlarmPoint sends an event when reached, so in the AlarmPoint's properties, set the event to the tag of the door (Door01 in my case). Now, open the properties of the NaliPriest, Orders tab, set AlarmTag to "FirstPoint": the tag of your AlarmPoint. Add a pathnode between the Nali and the AlarmPoint, or the Nali may not be able to navigate the level. Because the door was supposed to be opened by a trigger, its InitialState is TriggerOpenTime. But this means it will automatically close after a few seconds. We want it to open and then wait to be triggered again to be shut (which will never happen since the Nali won't do his animation again). This sounds like what TriggerToggle does, so set the door's InitialState to TriggerToggle.
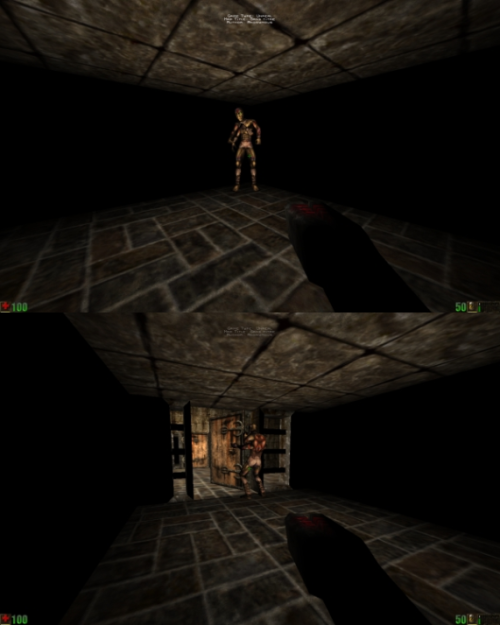
Now rebuild the map and test it:
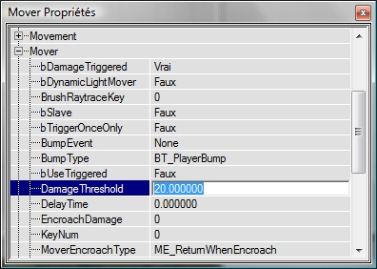
It's working. Now create the secret door for the hidden weapon: a simple mover with a specific tag, two keys and the TriggerToggle InitialState. Because we want it to open when damaged, set bDamageTriggered to true, and set DamageThreshold to something like 20.
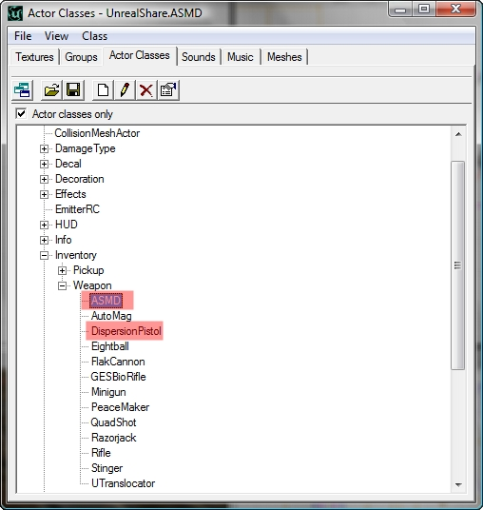
Now, in the actor browser, find the DispersionPistol and put it somewhere in the room. Then choose another slightly more powerful weapon and put it in the hidden alcove (an ASMD rifle would be appropriate).
At the moment, when playing the map, the player starts with full health and a dispersion pistol. It would be better to have a "clean" start with no weapon, like at the begining of the original game (plus who would put someone in a cell but let him keep his weapon?). Hit F6, and in the level properties, in the levelInfo tab, set DefaultGametype to: Class'UnrealShare.VRikersGame' for the player to start without a weapon.
This is nice. Now, you may add some health in the cells around (Inventory=> Pickup=> Health) so that the player does not meet resistance with only his 12HPs. It's time to spice things up with a fight. Continue to the next step to have the kralls appear.
Scripts and Events
Now, I want to add some action in this map. To prevent the player to simply walk away leaving his weapons behind, we'll need to add a door to the curved corridor and make sure that it gets triggered only when the player has some sort of weapon. Then, we will generate two angry kralls.
Scripted Events and fight
We have a very good tool for the first part: when a mover reaches its key, it sends its event. We will put something in it event of the secret door, so that the player will have to take the dispersion pistol and shoot the wall before the battle begins.
Now, create a door and make sure it is triggered by this same tag. Because we don't want this door to shut down afterward, chane its InitialState to TriggerToggle:
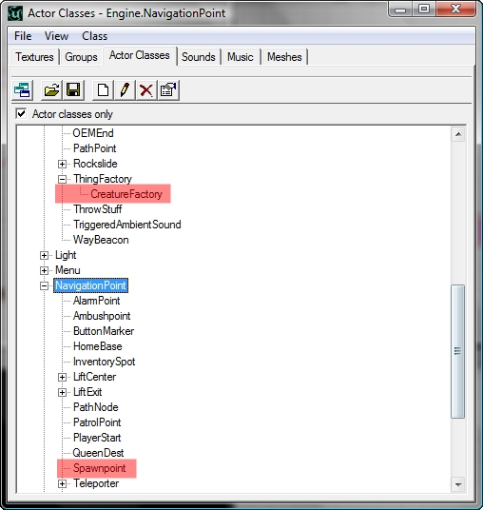
This is all we need for the door. Now, we want to spawn two kralls behind the gate. In the Actor Browser, we will use two actors: SpawnPoints, which will define where the kralls are spawned, and a CreatureFactory which will actually create the kralls. The CreatureFactory under KeyPoint=> ThingFactory, and the SpawnPoints are under NavigationPoint.
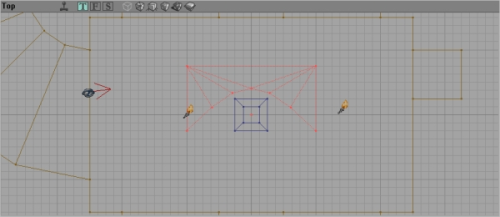
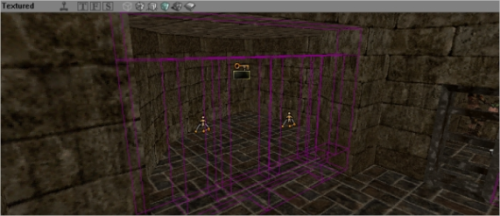
Put two spawnpoints behind the great door and a CreatureFactory anywhere (placement is unimportant).
To link the CreatureFactory to its SpawnPoints, they need to have the same tag, so put the same string in the tags of the three actors. Because the kralls should be spawned when the great door is triggered, use the same tag as the door. Once this is done, select the Krall in the Actor Browser under Pawn=> ScriptedPawn. In the CreatureFactory, ThingFactory tag, change Prototype to the class of the Krall by clicking on the field and on the "use" button that appears. We want two Kralls, so change MaxItems and Capacity to 2. Capacity is the number of creatures the factory can produce before going dormant, and MaxItems is the maximum number of creatures that can be kept alive by the factory at one moment.
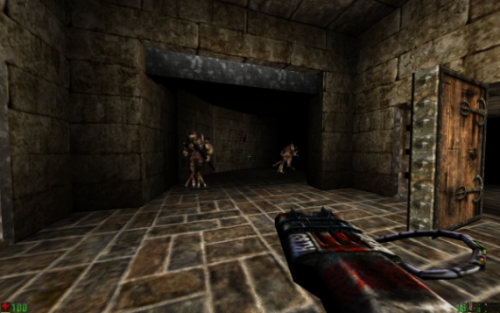
Rebuild and test your map:
A last important step has to be taken before we finish this level: lighting and sounds.
Lights and Sounds
Now that the architecture and gameplay of the level are finished, let' take a look at the atmosphere of the map. So far, we've been using a generic white and sourceless lighting and the map was almost entirely silent except for the sounds of the player and NPCs around.
Lighting
Since we are dealing with a medieval map, it would be very unadvisable to use large electric panels. Fire is much more appropriate. We'll use some torches to cast light.
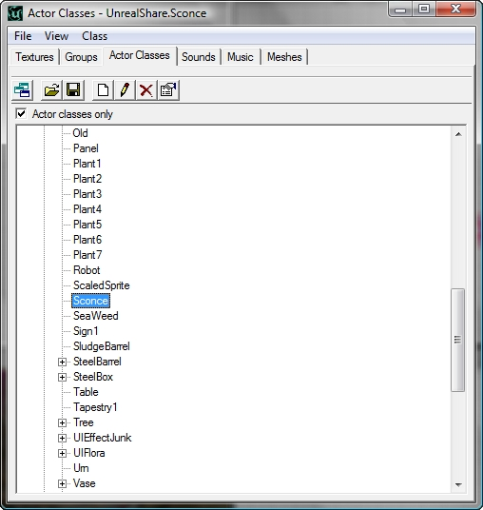
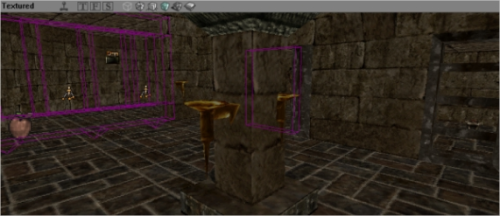
For a fire to existe, we need something to burn. At the very least, we need something like a pile of wood or a sconce. Luckily, UnrealEd has a sconce somewhere in its actor browser, under Decoration.
Add a few sconces to your walls. If you think they are too big, you can change their size by modifying the value in their properties Display=> Drawscale, with 1 being the default size, 0.5 being half this size etc.
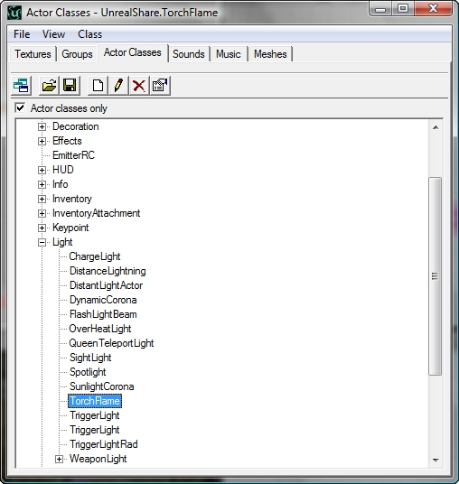
Delete any light you may have in your level. We need a fire effect for these sconces. Once again, UnrealEd provides us with a matching actor: Light=> Torchflame. You will have to downsize it a lot because it is huge by default:
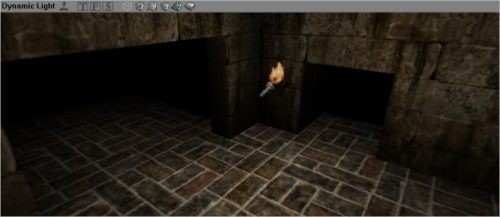
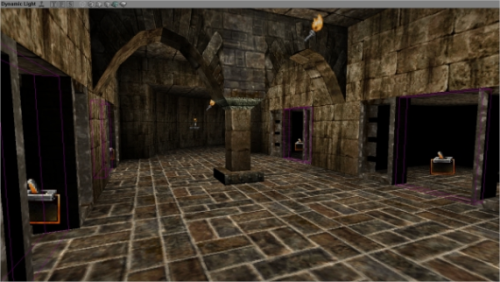
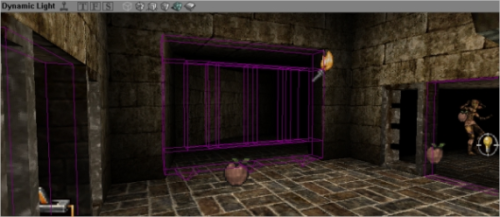
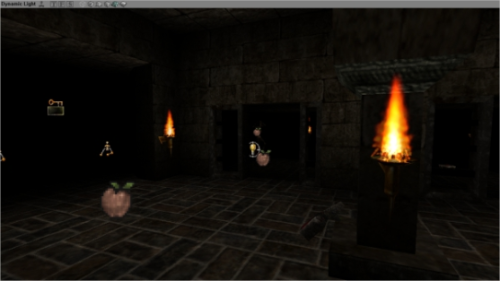
Put a small torchflame on eveyr sconce and rebuild : you already have a basic lighting with small firelike waves:
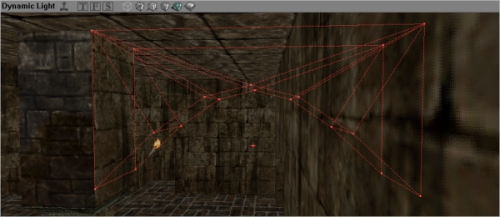
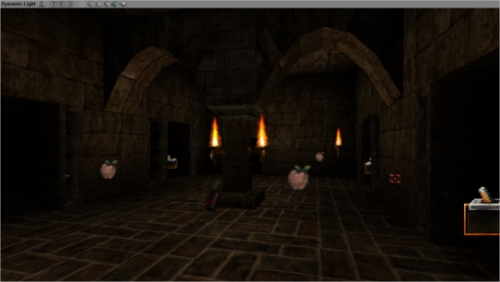
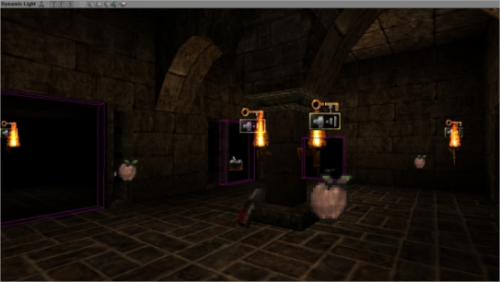
Obviously, all these bright torches should cast more light, and a coloured light too: orange or yellowish, not dull white. Use the lighting topic to change the colour and brightness of your lights, then rebuild. It should be decent:
Sounds
Nothing can possibly be as boring as a map completely deprived of sounds.
Since we have a lot of fire int his room, we should hear it crack and hiss around. In the Sound Browser, the AmbAncient.uax package has a lot of fire sounds in its Looping group. Select one and find the AmbientSound in the actor browser (under keyPoint).
Put an AmbientSound near each torch and put a sound in each one. Use several different sounds, otherwise the addition of multiple similar sounds perfectly synchronizes will produce one very loud and unrealistic sound in the map. If the result is still too loud (you can hear the sounds by activating the RealTimePreview of the 3D Viewport), simply modify the radius and volume of the AmbientSounds.
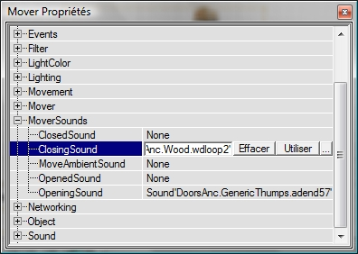
Now, we also have a lot of movers. Iron and wood doors should crack and creak when triggered. Use the DoorsAnc.uax package and put sounds in the movers:
Conclusion
This tutorial is now over. We have explored topics such as brushwork, lighting, movers, triggers, creature generation and dynamic effects. These are the basic steps required to start building maps. Look at the maps from Unreal and from other mappers to see how things are done and start your own project, or simply expand on the level you have created through the tutorial, there are many things to do: where does the corridor go? Why is the player here? Why did the NaliPriest wait for the player to evade? Where are the powerful weapons? Are there things to blow up?
Of course, you will not detailed instruction about every tiny function or actor here: It would be impossible to cover all the magic in UnrealEd in one tutorial, but you have been accostumed to the basic mecanisms of the software: detailed tutorials about specific aspects are to be found on the net and the OldUnreal community will happily help you with your unanswered questions.
Have fun building your own levels!
| UEd2.1 Help tutorials |
|---|
