ISV-Kran Deck 1
ISV-Kran Deck 1
Myscha the sled dog
So... you've survived Decks 4 through 2, and you're here on the top deck. What did that log say... get to the deck 1 transporters? And wasn't there something about electric force field barriers and a hull breach in the Observation Lounge? Time to move on and find out more.
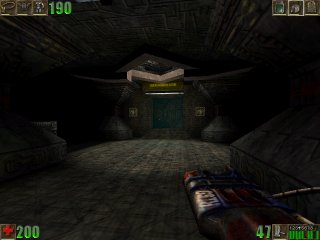
You start off in the corridor from the Primary Turbo-Lift. Go through the door and you will be at two large information panels.
"ISV-KRAN DECK 1: Log Entry: Captain Mikail Leatham. There's NO Possible way to kill them ALL There's just too many Skaarj and we don't have enough ammo."
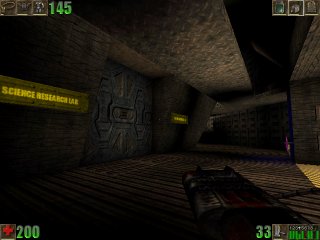
"ISV-KRAN DECK 1: Log Entry: Captain Mikail Leatham. Skaarj attacks have forced us to retreat to the Science and Research Lab. We set up a makeshift Electrical Field Barrier that destroyed 40 of them but 20 still remain."
Look ahead and you will see a crossroads of corridors with a "Transformer Room" ahead. Don't go up to the crossroads just yet.
I'll describe the current setting to you. This is a ring of corridors. At the far side of the ring the entrance to the rest of the map is blocked off by an electric beam. At the other three "corners" of the ring (including this one) are three "Transformer Rooms". Each must be deactivated before the beam will disengage. Sounds simple, but to complicate matters the corridors are patrolled by a (seemingly) endless supply of SkaarjScouts.
That first log should have given you a clue. Don't use up all your ammo trying to kill all the Skaarj. Instead, follow the next few paragraphs at a sprint, only killing Skaarj who actually get in your way (I recommend the Energy Amplifier and ASMD Secondary fire, or Amp & ASMD Combo if there are several Skaarj in a small space).
Sprint to the junction. Enter Transporter Room 1, where a monitor gives you a message.
"ISV-KRAN DECK 1: WARNING 85,000 VOLT ELECTRICAL FIELD BARRIER IN PLACE AT SCIENCE RESEARCH LAB. POWER DISTRIBUTION FROM THREE TRANSFORMER CONTROL ROOMS ACTIVE."
Press the button to deactivate the Transformer Room. Collect of the 2 Health Packs in this room if you need them (I didn't because I still had a Shield Belt and >100 Health from the previous map). Leave the room and go anticlockwise round the corridor ring until you reach Transformer Room 2. Enter and deactivate this second room, collecting 2 more Health Packs if necessary. Follow the corridor ring further round past the beam-protected exit until you enter Transformer Room 3. Collect of the Eightball Gun and 4 Health Packs here then deactivate this final transformer room. The electric beam should have been deactivated now, if you were to return to room 1 (which you shouldn't unless you need health), the monitor would have changed:
"ISV-KRAN DECK 1: ELECTRICAL FIELD BARRIER DEACTIVATED."
Return to the now open exit, pass through, then immediately press the button on the wall beyond to reactivate the electrical field so that you are not followed.
The lab itself is behind a hefty locked metal door in front. Another ring of corridors goes around the outside of the lab, so head clockwise. As you round the first corner you will see two beefy SkaarjOfficers. SkaarjOfficers normally carry Razorjacks but these ones only have Dispersion Pistols; count yourself lucky.
Round the other way from the beam-protected entrance (anticlockwise round the ring) is a door labelled "Crew Berths", but it is locked. Thus your only route from here is to go through the entrance on the ring opposite where you came in. You will arrive in a foyer with wooden crates at the base of a pair of metal ramps containing two Clips. If you look up the ramps you will see two corridors blocked at the far end by force fields, either side of a sign that says "Bridge". If you go down the right of the two corridors, you will find an information panel that explains the force fields.
"BRIDGE ACCESS DENIED: SECURITY FORCEFIELD ACTIVE: MAIN OVERRIDE LOCATED IN OBSERVATION LOUNGE."
Only one way to go then. Continue up the ramps; you will find your path blocked by wooden crates that you must shoot out of the way. Follow through and you will be on a raised walkway above the lab corridor ring below. Going clockwise round the walkway, you will find four Bandages behind metal barrels. Going anticlockwise as an alternative, an Automag behind further metal barrels. Either way, you will arrive ultimately at a glowing control panel with a view of the lab doors. Activate it and the huge lab doors slowly open. Drop down to the main corridor ring and enter.
In the lab, a button at the unbreakable window on the right opens the Crew Berths door beyond. The lab doors will have started to close soon after you entered, but if you are quick then you can be in and out of the lab before the doors close then through the Crew Berths door before that closes too. Alternatively, you can stick around and get full results out of the room you are now in.
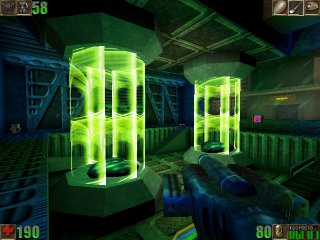
First, walk round the raised section of the lab and collect of the can of 12 Eightballs and three Bandages here. If you press the Crew Berths button you will see the Crew Berths door open temporarily beyond but you will be unable to reach it because you are now locked in. Look instead to the centre of the lab; two containment fields contain a collection of about six Amoebas. Go to the lower section and investigate the three panels from left to right.
"WARNING: LABDOORS AND SPECIMEN HOLDING FIELDS ARE MALFUNCTIONING. 30 SECOND RELEASE DELAY WILL ENGAGE AFTER ACTIVATION."
"ISV-KRAN SCIENCE RESEARCH LAB SPECIMEN MONITOR: I have found these amorphous amoeba to be highly acidic. It's incredible the architecture of their basic genetic structure. Tatiana Zimna Chief Medical Officer"
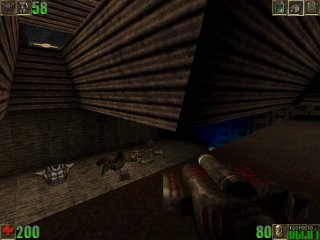
The third panel is a control panel. Activate it and get up the ramp on to the raised area. Shortly the fields will drop and the Amoebas will attack you. These close range attack creatures are difficult to target, so I recommend keeping your distance and using Eightballs to kill them. Soon the lab doors will start to grind open. Press the Crew Berths button then leave the lab and get through the Crew Berths door before it closes. On the walkway beyond, you can drop down to some maintenance areas below. Mind the engine coolant. Collect from dry land here 40 Tarydium Shards and a box of 50 Bullets. A service duct is your exit from this area, but first check your HUD to see if you still possess a Toxin Suit. If so, dip into the coolant. Visit either end of the stream. At one end is a can of 12 Eightballs. More importantly, open wooden crates at the other end to collect a box of 10 Flak Shells and an Invisibility powerup. Climb out of the coolant and go up to the service duct entrance. Enter when the grate is open and go up the next lift, via 40 Tarydium Shards. Following the ducts through, you will be in a raised area overlooking the Scientific Research Lab and its surrounding corridor ring. Try not to fall off yet; lowered sections of walkway here have crates containing two Health Packs and a box of 10 Flak Shells, plus steps back to the main raised section. At the far side of the raised area from the point at which you entered, a wooden crate contains Jump Boots. Collect these then, standing on the roof of the lab, jump up on to the roof beams to grab a Super Health Pack (you may need to use a Flashlight to do this). Drop back down to the main walkway of this raised area. Follow it round until you see a recess where you can drop down a step to an Assault Vest (see picture below).
Drop down on to this roof and collect the Assault Vest, Razorjack and two boxes of Razor Blades here. Drop down one stage further and you will be in the vicinity of the glowing control panel you used to initially open the lab. You need to visit the lab again to open the Crew Berths door, so open the lab doors, dart in, open the Crew Berths doors, then come quickly back out and return to the main Crew Berths walkway.
Following said walkway, you will shortly arrive at a crossroads. This next room is optional, but do it anyway. Go through the door on the left. As you enter the darkened crew berth, you will see a SkaarjWarrior operating a console at the far side. The Skaarj will see you but the console will explode, probably killing it (you may need to finish it off yourself). Collect a Clip from by the console, a Stinger from atop a crate in the darkest area of the crew berth, and an ASMD Core from near the entrance.
Go back out to the corridor; watch out for a pair of SkaarjTroopers with Dispersion Pistols who may have appeared. Then, go across the walkway and into the other crew berth. This one may seem empty but as you venture deeper into the room you will be ambushed by a SkaarjScout, so watch out.
Within this room, three ASMD Cores stand atop a large crate in the middle. I haven't managed to get these yet, so mail me if you know how because I don't! Anyway, in a corner of this room are 40 Tarydium Shards and wooden crates containing a Clip. There's also an information panel.
"ALERT: ALL CREW MEMBERS REPORT TO DECK4: SHIP HAS BEEN INFILTRATED BY A SKAARJ WAR PARTY."
Leave the crew berth and turn right, going to the far end of the walkway. One door later, you will be in a room where a Dispersion Pistol-armed SkaarjOfficer guards a room with two lifts to a walkway above. Kill the Skaarj. Before using the lifts, open crates to get two Bandages and two Health Packs. Ride the lifts. A door ahead at the top is labelled "Observation Lounge", but before going through, jump down the crates on the left to get two boxes of 10 Flak Shells. Return up the lifts and enter the Observation Lounge.
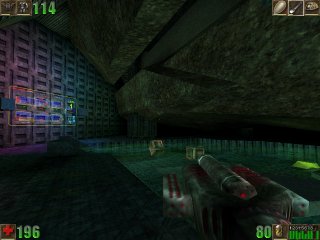
The Observation Lounge is the location of a hull breach; rock and water have entered the room. As you enter this area the ship will start to be racked by earthquakes; ignore them. To the right, a crate beneath some rock contains an ASMD Core which you can collect. There is a panel to the left.
"ISV-KRAN DECK 1: ALERT ENGINE COOLANT OVERFLOW: MAIN ENGINE RUPTURE: EVACUATE SHIP IMMEDIATELY"
Things are hotting up. Go into the water; crates here reveal 40 Tarydium Shards. Head over to a grate in the submerged floor held in place by a yellow clamp. Push the clamp to open the grate, As you open the grate, a SkaarjTrooper with a Dispersion Pistol may appear in the door. Kill it. Dive down into the submerged shaft you have opened and read the information panel at the bottom.
"BRIDGE SECURITY FORCEFIELD OVERIDE: STATUS ACTIVE"
Go along the shaft and activate the control panel at the end. The information panel changes.
"BRIDGE SECURITY FORCEFIELD OVERIDE: STATUS DEACTIVATED"
Surface and kill the SkaarjTrooper with a Dispersion Pistol that has appeared. Leave the Observation Lounge and sprint to the far end of the Crew Berths corridor. Leave the Crew Berths area and make a right, returning to the previously blocked entrance to the Bridge foyer. This information panel too has changed.
"BRIDGE ACCESS PERMITTED: SECURITY FORCEFIELD DEACTIVATED"
Enter the Bridge foyer and collect the ASMD from a corpse here. Ride one of the two lifts and kill the SkaarjWarrior guarding the bridge access at the top.
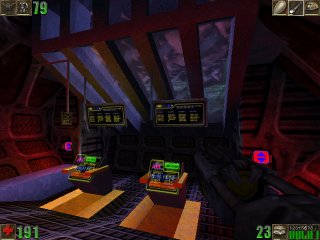
On the Bridge, there are switches to either side on the walls. Press one and drop down the revealed hole into the emergency transporter room below, where there are two information panels.
"EMERGENCY TRANSPORTER INSTRUCTIONS: STEP ONTO OCTAGONAL TRANSPORTER PADSYSTEM WILL ACTIVATE AUTOMATICALLY"
"EMERGENCY TRANSPORTER SYSTEM ONLINE: COORDINATES SET TO NALI VILLAGE 5 KILOMETERS FROM SPIRE SHAPED MOUNTAIN."
Step on to the pad. After a few special effects, you have exited the level.
| ◄ Previous | < | Current | > | Next ► |
|---|---|---|---|---|
| ◄ ISV-Kran Decks 3 and 2 | - | ISV-Kran Deck 1 | - | Spire Village ► |
