Vortex Rikers
Vortex Rikers
Cliff Bleszinski
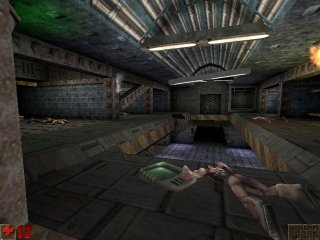
It all begins in the wreck of your prison transport vessel. In this first level you will have to make it your priority to find a basic weapon and get some health. Having just crashed you are severely injured, and have only 12%. You have also been completely stripped of your worldly possessions, so have nothing with which to begin your journey.
What you do next is crucial to the whole game. Step out of your cell, and walk to the far end of the prison promenade. Take the lift, and take the Universal Translator from the dead guard. Throughout the game the Universal Translator will be used to relay messages and important information about your surroundings to you, so it is important that you get it first.
Grab the Universal Translator:
Now we are ready to go, and can start to explore the wrecked ship. Drop back down to the floor, and explore the cells. Going clockwise from the back right; the first cell reveals nothing but a corpse. The next cell is more rewarding, with +5 health Bandages atop the blood-filled toilet. Continuing, cell 3 is empty, but cell 4 has a diary which, with the Universal Translator you collected (press F2) reads:
"Benjamin Nathaniel's Diary, day 93: Today is my birthday. I will celebrate by attempting to start another prison riot."
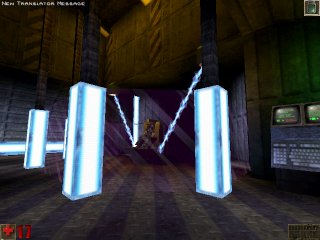
Cell 5 is empty except for a highly dismembered corpse and cell 6 is of course your own, so let's move on. Before going back up the lift, take a detour to see a display of Unreal's special effects. Head for the dark opening on the promenade and press the small light object on the right. This lever sends the floor down as a lift. Head over to the control panel to the right. Approach it, and you will be informed,
"Prisoner 853, James Cavannaugh ready for electrocution"
Look through the glass at the electric chair, and be both amused and disgusted as the corpse in the chair is spectacularly gibbed :-)
Poor James Cavannaugh:
Now return and ride the lifts back up to where you found the Universal Translator. Let's explore the remaining cells, starting with the furthest on the left and going anticlockwise. The first cell reveals a diary.
"Boris Clague's Diary, day 3: I have been here but 3 days and already I have two cracked ribs, a fractured thigh, and fourteen stitches. I don't know if I'll make it to the prison moon, much less to the end of next week."
Cell 2 reveals a corpse and a blocked toilet, but most importantly a Flare which you can collect and use to light up dark areas later. Cell 3 reveals just another corpse, so cross over to cell 4, reading the monitors as you go past:
"ATTENTION ALL PRISONERS: Remember, be kind to your cellmate. Violence will not be tolerated."
"ATTENTION ALL PRISONERS: Lights out at 20:00. No exceptions."
Cell 4 will provide a handy +20 Health Pack. Watch out as you approach cell 5, for there will be explosions as a light fitting collapses and you might just get squished. Cell 5 reveals another log:
"Jonas Gershwin's Diary, day 204: There was another roach in my lunch today. I wonder how they make it on board starships such as this one. If that bitch in cell 4A keeps looking at me funny I swear I'm going to rip out her larynx!"
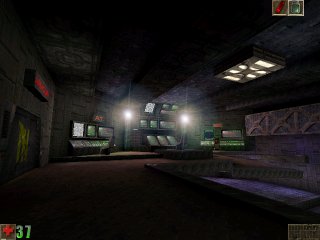
Cell 6 reveals only a blocked toilet, so it's time to move on. The door at this end of the balcony will not open, so instead, head up the air duct with the missing grill. The duct is noisy and full of a green fog; don't worry about that it's harmless. As you walk though be prepared for a sudden exposion ahead. You might even catch sight of a creature darting away at the far end... but ignore it. Moving on, the music will start as you enter the bridge. Look at the consoles - mind the "corpse" - to receive the following logs:
"Navigator's Log: Vortex Rikers. We are on route to the prison moon. Long-range sensors are detecting uncharted magnetic masses in Gamma Sector 83H. The Captain has ordered a change in course."
"Captain's Log S. Kroon: Vortex Rikers. Altering our course may have proven detrimental to our mission. We are caught in the gravitational field of an uncharted planet. I have ordered the engine foreman to divert power to the drives."
"First Officer's Log: Vortex Rikers. The prisoners have become more restless as we get closer to the prison moon. Security says they have the prisoners under control but several have had to be taken to the med lab for treatment."
The Bridge:
Now hop off on to the level below. Head up the steps and through the door beneath the consoles. Push the lever to ride the lift up into the armoury, where you will see a Kevlar Suit armour item behind a forcefield. To deactivate the field, jump and head-butt the blue switch on the power conduit. Having collected the suit, head along the slippery corridor collecting the Health Pack as you go. Emerging back on to the bridge deck, take a moment to step on to the beams to the right. If you fall off, go back up through the Armoury and try again. Collect the Clips (Automag / Minigun ammo) from atop the beams then drop down to the floor via the Health Pack on the intermediate level. Follow the corridor. Beware explosions and the dancing electric cable. The far end of the next room reveals a Health Pack and the following computer log:
"Chief Medical Officer's Log: Prison Vessel 254 Vortex Rikers. The constant fighting between the prisoners seems to be getting worse. At this rate, I will be out of supplies long before we reach the prison moon."
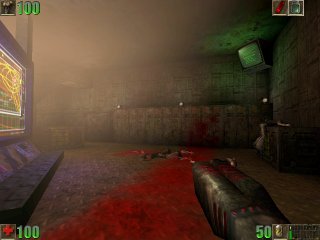
Follow the door marked "Med Lab" into the red room with nothing of interest except for some Health Packs which should take you to 100% by now. Enter the next corridor, and the door will shut behind you. Although you will seem to be trapped, there is a crack visible under the next door. Something is going on in there: there is a growl, yells, sounds of gunfire... then the door will open to a spread of body parts and the sight of a strange reptilian humanoid running away. Ignore it for now...
Gibs:
Entering the room, you can now collect your first weapon, the self-recharging Dispersion Pistol. Proceed down the hall - the music which stopped as you entered the Med Lab now restarts as you realise that the creature has vanished. Follow the corridor past broken corpses and go through the door marked "Area C". On the right of this room is a Health Pack behind glass that can be shot to pieces if required. From here, take the right of the two fan ducts, which is damaged and contains no blades. You will arrive at a lift and some consoles. The console reads:
"Engine Foreman's Log: Prison Vessel 254 Vortex Rikers. I am juicing up all the power I can to escape from the gravitational pull of this mysterious planet. It doesn't seem to be working."
Now, press the switch on the console and wait for the cargo lift to descend. Step aboard and it will rise automatically to the walkway above. Continue through the "Area B" door - mind the ship-quake - then along to the far end of the area through the bars. One more log here on the consoles:
"Chief Security Guard's Log: Prison Vessel 254 Vortex Rikers. They've pulled all the power to the drives to no effect. We're spiralling towards the planet. I don't know what's going to happen to us."
That done, shoot the glass on the wall marked "In case of emergency break glass". The switch beneath will activate, and a trap door on the floor will open. Jump down the escape duct to complete the level.
| ◄ Previous | < | Current | > | Next ► |
|---|---|---|---|---|
| ◄ None | - | Vortex Rikers | - | NyLeve's Falls ► |


