The Darkening
The Darkening
Eenocks
With the generator wiped out, the ship is in darkness, and through the darkened MotherShip Core and MotherShip Lab you must travel to try and gain access to The Source. But it wasn't easy - the darkened corridors and rooms of the ship are packed with experimental Skaarj and former detainees.
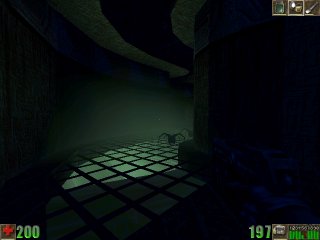
You start once again between the two sets of doors. Go through and into the curving corridor, where you will be attacked suddenly by a pair of Pupae.
Kill the Pupae. Go out into the corridor and round to the first junction. Activate your Searchlight - I'll assume for the rest of this walkthrough that you have it switched on, because it won't run out in a hurry. Now, do you remember in MotherShip Core the locked door to the Emergency Power Supply? That is your target for this map. So, time to get moving.
The equipment cache that was behind a force field at the end of the previous map has been revealed. Inside are two Flares, two Health Packs, another Searchlight, two cans of Tarydium Sludge, two cans of 12 Eightballs, and two boxes of 10 Flak Shells. Collect. You'll also see a lift at the back of this cache.
Shortcut: I'm about to go on a detour for the sake of completeness. It will gain you nothing but a couple of monsters to kill, but you may want to explore the map. If you are just looking for the best route through this map, then go down the lift in the cache, and rejoin the walkthrough later (go to §).
Leave the lift and go along this upper MotherShip Core corridor. At the first corner, you will have to fight a Pupae. There, you will be able to hear Mercenaries talking - don't worry too much. Continue along the corridor. At the second corner, mind a Pupae who drops from the ceiling. At the end of the corridor, you will be back at the passageway to the raised crossroads. Go out on to the crossroads, and you will receive a rather nasty surprise.
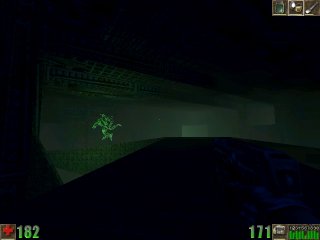
A glowing green semi-tansparent SkaarjLord sees you and dashes off down the exit to the Security Post. Shortly it re-emerges, and comes out at you with claws outstretched. Flak it quickly. Go out on to the crossroads. The forcefield bridge has gone, but there was nothing to do along there anyway. The two passages back to the cryopods area are locked - that's a shame because that would have been a quick route.
That leaves three options - back to the lift at the start, into the security post, or dropping off to the Loop below. DON'T drop off to the Loop, I will take you down there by a better route later. If you go into the Security Post across the platform over the core room and into the passage beyond, all you'll find is a Pupae. So, return to the start of the level via the corridor and go down the lift in the equipment cache.
§ At the bottom of the lift, you will find more gear in the form of a box of 8 Rifle Rounds, an ASMD Core, two boxes of 50 Bullets, a Flare and a Shield Belt. Go forward into the next room - you'll come out in the very first room of MotherShip Lab.
As you enter, a semi-invisible SkaarjBerserker giving off a bright aura of blue light sees you and sprints off. Follow him and dispose of him as quickly as you can, because once he reaches the the junction room with the lift to the detention area he'll turn round and lay into you. He'll take some pain, he's tough. When he is dead, go to the aforementioned junction room.
Shortcut: I'm about to take another exploration detour. Once again, if you don't want to go, follow this shortcut. Basically, stay put (go to ¶ ).
Go to the detention area lift and press the button. Surprisingly, it still works. Enter the corridor - but prepare for another ethereal SkaarjBerserker who charges down the corridor at you.
You can investigate the prison cells if you want; but you'll find nothing in the corridor to the left, and all you'll find in the other corridor are two Pupae and a dead SkaarjAssassin. So, return to the main detention area corridor. If you go up the ramp and into the portal junction room, you will see that the portals are inactive, and the door to the lift down is locked. The curving tunnel to the room with the forcefield window leads out of this room, but although the forcefield is down you won't be able to jump up from there anyway and all you'll find is a Pupae. This route is a no-go then. Return to the main junction room at the bottom of the detention area lift.
¶ In the junction room, go through the door opposite the way you first came into this area. You know the door I mean... the one you came back through near the end of MotherShip Lab after going down that circular lift. The corridor beyond leads you round into a room with a dancing electrical cable on the ceiling; avoid the cable and go to the far end of the room. Mind the Pupae lurking in the shadows. Follow the corridor at the far end round such that you arrive at the bottom of the circular lift, which is still down with the platforms extended. Go through the other doors in there, back to the staircase that was where you started in MotherShip Core.
At the top of the stairs, you arrive back at the small lift. Once it has come down, ride it back up and you arrive in the network of corridors and rooms that I called the Loop in the MotherShip Core walkthrough. The best route to take from there is to the right, into the next room, where you are attacked by an ordinary SkaarjWarrior.
Do you remember that alcove at the bottom of of the next sloping corridor with the gear and SkaarjBerserker in it? Well, it's accessible now, so go down the corridor and kill the SkaarjBerserker. Kill the Pupae which attacks from the right. Go into the alcove for the gear; a box of 10 Flak Shells, two ASMD Cores, a Rifle Round, two cans of Tarydium Sludge and a Super Health Pack. Then, leave the alcove and go straight across to the balcony over the core room.
Follow the balcony round and take the walkways round the side of the core room. You will shortly arrive in the corridor with the security door - beware the dancing electrical cable on the ceiling - and kill the green transparent SkaarjOfficer with a Razorjack who attacks from the right. Kill him and collect his Razorjack.
Now... the way to the Emergency Power Supply is clearly through the open security doors and down the slope beyond. But I would urge you to take this detour - go the other way up this corridor, past the sparkling electrical cable and round the corner into the next stretch. There is a glowing green transparent SkaarjBerserker there, so kill it.
Go along the corridor until you arrive at the room with the ramps going down. Kill the glowing green transparent SkaarjInfantry with a Stinger on guard there and collect the Stinger that he drops, then also kill the three Pupae who emerge from the wall opening at the back of the room down the first set of ramps. When they are all dead, go into the wall opening yourself and you will see that the electric barrier that was blocking off an alcove there in MotherShip Core has gone. You can collect the gear in the alcove; an Assault Vest, two cans of Tarydium Sludge, two ASMD Cores, two clusters of 40 Tarydium Shards, two boxes of Razor Blades and an Assault Vest.
If you want, you can go down into the core room, but all you'll find are a Mercenary and a MercenaryElite who've escaped from the detention area. So, go back up the ramps and return to the security doors, either directly or if you're a masochist the long way round (anticlockwise round the Loop) to fight an extra Mercenary and four more Pupae.
Back at the security doors, go through and down the sloping corridor beyond to the walkway at the bottom where you'll meet a glowing green SkaarjGunner with an Eightball Gun. Kill him and collect the Eightball Gun that he drops. Go along the walkway - mind the Pupae that drops down at the end - and go into the corridor at the far end. Avoid the electrical cable there and proceed to the energy lift.
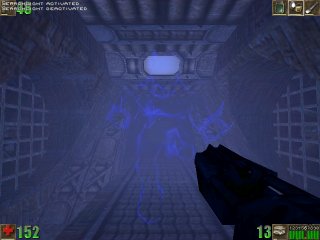
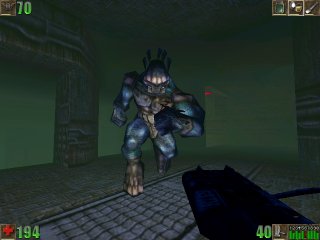
Prepare yourself. Step on to the energy lift and it rises to the top. Step off into the science area at the top. As you approach the Emergency Power Supply door on the left, you are charged by an IceSkaarj - it's the huge blue Skaarj you saw in the detention area in MotherShip Lab, and it'll take a helluva lot of punishment before it falls.
Kill the huge Skaarj. Watch out as you fight for a pair of Pupae who may come out from an adjoining room. When that area is clear, head for the big doors that the IceSkaarj was guarding. They're the doors to the Emergency Power Supply, and they're unlocked now. Go through.
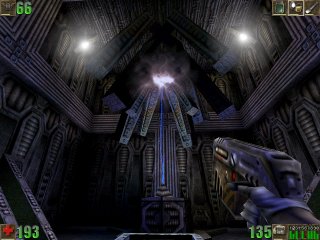
You emerge in a long room. Along a metal walkway ahead is the Emergency Power Supply unit, but it's currently inactive. Doubling back to the left of the entrance is a locked door with a message.
"The Source Antechamber, ACCESS DENIED"
There's also a corridor out of this area. It was to the right as you entered. Go along it, and you are in a room with a panel at the far end. Go along and read it.
"Authorization granted. Acivate the Emergency Power Supply."
Return to the large room and climb the ramp at the entrance on to the metal walkway. On the walkway, walk along to the far end. As you approach the power supply unit, it rumbles into life.
Once the power supply is active, look round and you will see that the message over the second set of doors has gone. Go through to exit the level.
| ◄ Previous | < | Current | > | Next ► |
|---|---|---|---|---|
| ◄ Illumination | - | The Darkening | - | The Source Antechamber ► |
