Glathriel Village (part 2)
Glathriel Village (part 2)
Matthias Worch
Glathriel Village harbour seemed surprisingly free of Skaarj. Now, as you drop into a strange crypt-like underground cellar, you find it dangerously infested with voracious spider-like creatures.
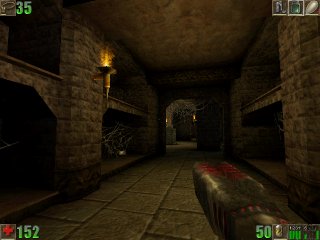
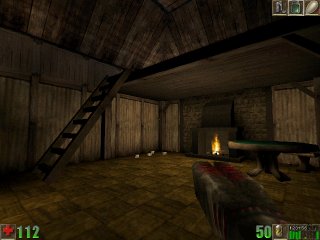
You start in the cobweb-laden crypt, on the floor below the hole through which you dropped to exit the previous level. To either side in this small area are shelves, and ahead the crypt opens out into a wider space.
Ready your Grenade Launcher. Set off towards the area ahead. As you approach, you will hear a sharp hiss and you will see a Spider lurking in a dark alcove to the right. The Spider will not come towards you, so blow it up at your leisure. Step out into the central area, where there is a tomb in the middle of a small hub room. There, another Spider will see you. This one comes scuttling towards you, so try and avoid its acid attacks and fangs. Kill it.
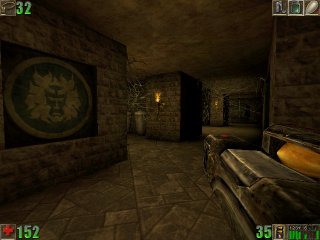
Start straight across the crypt. You will enter another offshoot much like the one in which you started. In this offshoot, you will find that the first bottom shelf on the left contains a Nali Fruit Seed, a Flak Shell and an ASMD Core. Collect the gear. Return to the main crypt and go to the right, arriving at the far end. There, two Spiders will sight you from the corridor with the staircase ahead while two more will come from further offshoots on either side. Kill all four.
Before leaving via the staircase corridor, raid the remaining offshoots. In the offshoot to the left, the back left shelf contains two clusters of 40 Tarydium Shards and a Nali Fruit Seed. The back left shelf of the final offshoot contains two further clisters of 40 Tarydium Shards.
Return to the crypt. If you want you can push on the end of the tomb to open it, but it reveals nothing of gaming value. Head instead up the corridor with the steps and enter the area at the far end.
The area you are now in is a main crypt hall with two minor halls on either side. Go past the first minor hall and look down the main hall; a Spider attacks from the far end. Kill it. Then, enter the far minor hall and kill the Spider there. Go along the minor hall. Remove vases in the way in an alcove to the left then collect from said alcove a set of Bandages, a box of 50 Bullets and two Flak Shells. Go to the main hall and along to the arches at the end. Go through the arches into the next small area, where there are four doorways. The door to the right and the two doors ahead each go into small tomb rooms, with a chest in each. Two of said chests reveal a set of Bandages each. When you're done with the chests, go through the fourth doorway, which leads to a staircase upwards. Climb the staircase to enter a small hallway lit by lamp stands. Follow the hallway along and go through a doorway at the far end, and you come out inside a church where a Nali Priest prays by a dead Nali on an altar. As you approach the altar, a window above shatters and a SkaarjScout leaps in through it, much to the terror of the Nali. Try to kill the Skaarj without harming the Nali - the Nali will still be afraid of you but at least he'll be alive. There's a UMS drop box by the altar. Open it for a pack of 10 Grenades. Then, read a diary the Nali Priest (who has probably scarpered) has left on the altar beside the dead body.
"What did we do wrong to anger the gods? First the Nightstalkers, then the huge thunderbird flew over our valley and seeded fire and destruction. And now those strange boxes are raining from the sky, hitting our houses and killing our people."
When you're done, go to the double doors at the far end of the church and step outside.
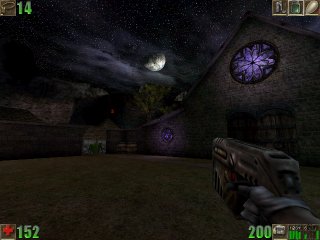
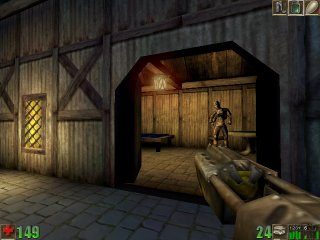
You are in a small garden outside the church. Looking back at the church as pictured, you will see two barrels and an exit from the garden. Shoot the barrels open for two clusters of 40 Tarydium Shards, then go through the exit from the garden. You come out in another garden area where a Manta swoops towards you from the right. Kill it, then go into its corner for a Nali Healing Fruit. When you're done, return to the dirt path through the garden and follow it down towards the houses.
The way is blocked in that area by a stack of hay bales. You can get past the blockage by jumping up the slanting hay bale. If you have trouble with that, you can go to a rock further along to the left and use it to jump over the garden wall, but you'll land right in front of a Skaarj.
Once over the bales, there are various ways to go. A grass path leads you to the right, while there's a small village square ahead and a pathed path to the left. First, go down the paved path. The path shortly turns a corner to the right into an open area guarded by a SkaarjWarrior. Kill the Skaarj. Here, you will see that the open area is blocked by a collapsed wooden bridge between two buildings. Turn around and return to the junction. Go to the right at the junction, past the hay bales, and onto the grassy path. Follow the path, collecting a Nali Healing Fruit on the way if you need it, until you reach a doorway to a small courtyard on the left. You will find that it is blocked by bars.
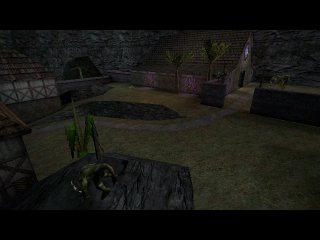
The lake lies ahead
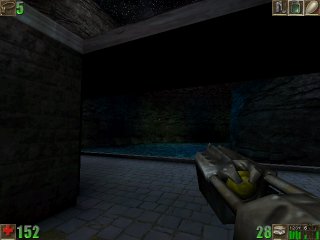
Go to the far end of the footpath. You come out on a paved lakeside path. Ahead, the water stretches off a little way into the dark, with a long jetty running parallel to the footpath. Go along the path to the right. You will find a doorway back into one of the buildings (some kind of barn) is also blocked by bars. A grassy area at the end of the path reveals nothing, so take a dip into the lake. Go to the back of the lake - beware two strong Devilfish lurking in the shadows - and open a UMS drop box you find there for a Combat Assault Rifle. Collect the CAR then swim to the jetty and climb out. Go along to the end of the jetty near the grassy area you entered the water from to find steps back up to the waterside path.
Follow the footpath along, past the end of the grassy path you entered this area by, and you will find a covered footpath that leads into the village square you passed earlier. If necessary first take a detour to grab a Nali Healing Fruit from the end of the waterside path, then enter the village square.
As you enter the village square, doors open on a balcony to the right and a Nali runs out with a cry of fear. It jumps down and runs across the square, hotly pursued by an angry SkaarjScout, and opens the door of a small house, taking refuge inside. Intercept the Skaarj with your Flak Cannon. When the Skaarj is dead, the Nali will summon you.
Enter the house and follow the Nali's gesticulation. He points you into a room with a lever and a window out to the small area you saw blocked off by barse earlier. Press the lever and the bars open. Leave the Nali's house and go round to the left. You will be back at the junction by the hay bales. Follow round once again to the grassy path, and enter the now open area. It's a small yard with a hay cart on which there is a UMS drop box, a Nali Healing Fruit and a slanting ladder. Open the drop box for a 50 bullet CAR Clip, then climb the ladder. You arrive on a balcony above the waterfront footpath.
Go to the left along the balcony. You will find a door into the building from which the Nali fled. Kill the SkaarjWarrior lurking within but don't go inside yet. If you go to the other end of the balcony, you will find another door into the barn which is locked. Go to half way along the balcony. You will see that you can walk along the top of a dividing wall and climb steps to get on to the roof of the Nali's house. Do so. From there, you will see a UMS drop box on the roof of the building from which the Nali fled, but don't go up there yet.
Jump across from the roof of the Nali's house on to the roof of the barn. On top of the roof, you will find a large hole leading inside which you can drop through. Watch out for a nasty Giant Manta prowling around up here.
Go inside the barn and go down to ground level. There, a Nali lies dead on the floor with his diary nearby, between two UMS drop boxes.
"I found another one of those strange objects that fell from the sky. I will collect all that I can find and then bring them to the priest. He will know what we are meant to do."
Open the two drop boxes. It's a bit of a treasure trove from your point of view - you will find a box of 10 Rockets (Rocket Launcher ammo) and a useful Rocket Launcher. I would advise that you steer clear of using it for the confined spaces of the village though. Once you have collected the gear, press a lever in the corner to remove the bars from the exit. Go outside and find the ladder back up onto the balcony. Climb it and return to the roof of the Nali's house. This time, hop up on to the roof of the building from which the Nali fled. Open the UMS drop box up there to collect the 50 bullet CAR Clip it reveals. Go to the far end of this level of the roof. At the end, go down the slope of the roof towards the lake (don't fall off). Look along to the left when you reach the bottom snd you will see that a narrow section of roof continues along-side the wall of the taller part of the building. Follow this section of the roof to the end; there, you will see a cave entrance in the cliff. Hop through the entrance, follow the short cave, and drop down the hole at the far end.
You are in the underground Nali hideout referred to by a diary in the previous map. There, three Nali and a Nali Priest pace around the cave and pray, while another Nali meditates by four further Nali who are sleeping. Collect a set of Bandages from by the beds, then go to a table at one side of the cave which has on it three Bandages and a diary.
"Two more died last week. Luckily we got them out through the cave without the Nightstalkers taking notice. We're low on food again..."
Before leaving, open a barrel by the table for a Super Health Pack. From the table, go to the left, entering a small stone corridor. Climb steps within the corridor and press a lever there; the roof of the corridor opens, allowing you to climb out into the room above. Beware the nasty SkaarjAssassin lurking in a corner in said room. You are on the ground floor of the building from which the Nali fled. Up on the walkways above, the doors out towards the lake are open whilst the others - the ones through which the Nali fled - are shut. There are five Bandages by the stairs you just came up should you need them. Go to the back of this room - the corner where the Skaarj was lurking - and press the lever there. The doors through which the Nali fled on to the balcony above the village square are now open. Climb one of the flights of stairs to the upper level and go out through these doors. You will see that doors at the other end of the balcony have opened too.
Cross the balcony and enter the building beyond. As you enter, a bookcase if pushed off the raised area to the left as a SkaarjAssassin bounds down and shuts you in. Kill the Skaarj. Descend the steps in this room. If you need health, shoot the table beneath the steps to pieces to get to the four Bandages underneath. Once on the ground floor, you will find that the door out to the village square is blocked by further fallen bookcases. So, go through a doorway near the bottom of the stairs. One short corridor later, and you are in an extension of the library where two Krall and a KrallElite are playing dice. Interrupt their game with a secondary fire Stinger attack.
Go through the doors beyond where the Krall were crouching. You come out on a paved road with a Nali statue and a UMS drop box ahead. Destroy the drop box for a Health Pack. Look in both directions along the road; to the left, the road continues off between houses. A Nali summons you from a balcony above. To the right, the road ends at a lever. Go and activate the lever to open a gate back to the village square, then turn around and go along beneath the balcony / bridge where the Nali stands and head off between the houses.
The road shortly turns round to the left. Turn the corner and kill the SkaarjInfantry with a Stinger who comes running from a distance and collect the Stinger it drops. Following the road, you will find a barrel on the right that contains an ASMD Core. Beyond the barrel, between the houses, is a Nali Healing Fruit.
Go on up the road. You will pass a doorway on the left, and further along a familiar broken house on the right, coming eventually to a small Nali house. Go inside.
There are four Bandages in here. When you've taken what you need (there's nothing upstairs), leave the house and backtrack to the doorway in the wall. Going through, you will emerge back in the open area with the broken bridge in the middle, but on the other side of the obstruction. Go to the right here and look through doors into a small room. Beware a SkaarjWarrior that jumps down from the upper level. Once the Skaarj is dead, climb the ladder and look across the broken bridge. The door at the far side is locked. Go to the left on the upper level in this room and press a lever you find there. Returning to the doorway, you will see that the doors at the other end of the broken bridge are now open, and that the Nali who saw you on the other bridge has come through and is still summoning you from beyond.
Cross the collapsed bridge and enter the building. The Nali leads you out and across the other bridge, into another small building beyond, where he stands facing a door on the level below. Follow him into the last building but beware a SkaarjTrooper with a Dispersion Pistol that attacks him from the right. When the Skaarj is dead, go down to the lower level and into the field beyond. Visit the left and right corners at this end of the field for three Nali Healing Fruit. Then, cross the field and approach the cave entrance at the far end.
The cave tunnel you enter takes you round a bend and into a larger cave where you will be unpleasantly surprised by a SkaarjOfficer with an ASMD. Kill it and collect the ASMD it drops then enter the cave properly. About half way through the cave, a fence with a gap in it marks a small drop. Jump through the gap to exit the level.
The scene cuts to an intermission with a view of the church. The church bell is tolling. The player records a log entry.
"I'm close! I've seen the first evidence of the crash site! During a tough slog through a Nali village infested with Skaarj, I came across pieces of a crashed Terran ship. The debris was seared from re-entry and scattered over a wide area. I hope she didn't break up in the air - if she did, there won't be any cores to recover. The crash site is very close. I'm nearly home free!"
When the log entry is complete, press Fire to start the next level.
Next level walkthrough Approaching UMS Prometheus
Return to walkthrough Glathriel Village (part 1)
| ◄ Previous | < | Current | > | Next ► |
|---|---|---|---|---|
| ◄ Glathriel Village (part 1) | - | Glathriel Village (part 2) | - | Approaching UMS Prometheus ► |
