Difference between revisions of "Importing vertex meshes into Unreal"
| Line 6: | Line 6: | ||
I will use my new RocketCan mesh which I made for Unreal Redux as example. | I will use my new RocketCan mesh which I made for Unreal Redux as example. | ||
== Part 2) File Formats | == Part 2) File Formats And Blender Plugin == | ||
Unreals vertex mesh format requirs two different files for the import.<br> | Unreals vertex mesh format requirs two different files for the import.<br> | ||
Revision as of 02:24, 22 March 2021
Part 1) Intro
Unreal Engine 1 is one of the older engines which seems to be user unfriendly when it comes to importing new animated meshes into the game.
In this tutorial I like to share my workflow how I prepare and export meshes from blender and get it into Unreal / Unreal Tournament.
I will use my new RocketCan mesh which I made for Unreal Redux as example.
Part 2) File Formats And Blender Plugin
Unreals vertex mesh format requirs two different files for the import.
The _a.3d stores the vertex animation timeline and the _d.3d stores the mesh data like the UV Map and materials / poly flags.
Thankfully Skywolf wrote an exporter for Blender which allows exporting the meshes in the right formats!
Link to the thread + downloads: Skywolfs Blender Vertex Mesh Importer / Exporter Plugin
For this tutorial I will use Blender 2.80. The plugin for blender works flawless in this version I don't know if there will be future updates for the plugin for newer Blender versions.
Part 3a) Preparing Your Mesh - Boundry Box
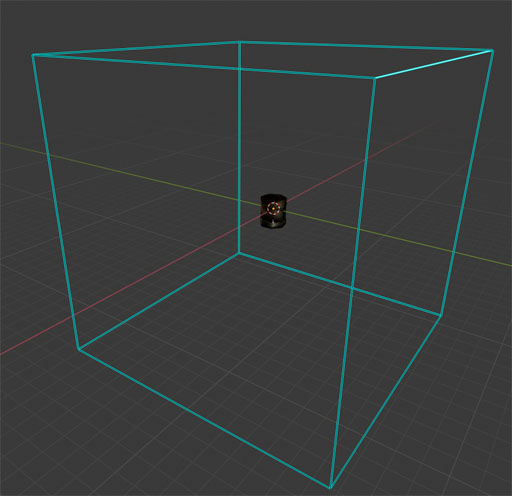
The most important part is that your mesh is inside of a boundry box with a size of 256 x 256 x 256 Unreal units.

If the mesh leaves that box caused by an animation or if it is bigger, your mesh will get cut and vertices will merge during the import progress.
To check the right sizing and max out your animation range you can download this Cube.obj
File:256Cube.7z
In case you don't want to download the file you can convert the default Cube Builder Brush from Unreal to a static mesh - export it as .obj and import it into blender.
Part 3b) Preparing Your Mesh - Timeline Animation
I setup an simple armature system for the mesh which includes an "Open" and "Close" animation.
- Frame 1 is the "default" position or the "Still" position the mesh.
- Frame 3 is the "Open" postion
- Frame 5 the "Close" position.

TIP: If you animate a weapon or a pawn your animation should always end with your mesh's start position.

