ISV-Kran Decks 3 and 2
Myscha the sled dog
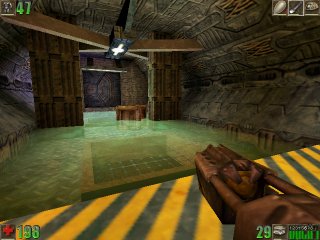
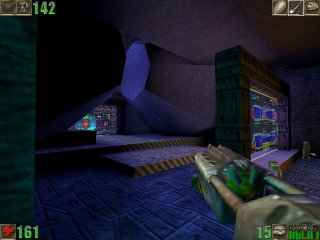
With deck 4 behind you, you pass through the doors and arrive on deck 3. Here the Skaarj infestation is true, as you are forced to fight through packs of Skaarj in order to find your ultimate goal - to escape this blighted planet.
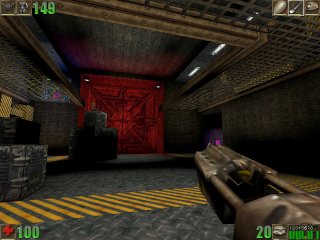
You start in front of another large pair of doors. Press the switch on the left and the doors slide open to reveal another large room with crates and a balcony above. On the left are some huge doors, but they are locked. Go around behind the crates to the far side of the room to get a box of 10 Flak Shells.
Step out over the main room and press a switch to open doors on the other side of the room from where you came in. A SkaarjScout may jump down from the balcony if you're unlucky; kill it. When the doors are open you will probably meet a nasty
SkaarjAssassin coming the other way. If you don't, then he will be waiting for you at the top of the next lift. Keep your guard up.
Kill the Skaarj. Look around this room; a button-operated lift leads to the upper level, and a stack of crates on the left has an unreachable 25kg can of Tarydium Sludge and a box of 50 Bullets. Press the button to call the lift, then step on it and it will rise. You may be able to jump to the ammo on the crates as you rise but it'll be tricky.
At the top, go through a short corridor out on to the balcony. There are two hatch doors on either side of the room up here but you're not ready to open them yet. First, go to to the back balcony and open the wooden crates in the alcove to get 2 25kg cans of Tarydium Sludge and 2 Health Packs.
If you look down at the crates on the main floor below, you will see an ASMD Core on the highest one. Drop down to the ASMD Core then go crate-hopping from here to get a can of 12 Eightballs on a lower crate beneath the balcony.
Return back up the lift and this time go right round to the far end of the balcony and operate the control panel here. The huge doors in the room below will slowly open; go through them into the primary shuttle bay.
The primary shuttle bay is a very tall room beyond the huge doors, which close behind you. As you enter beware the SkaarjScout who ambushes you from the side; kill it. Wooden crates in this room reveal two Health Packs and a pointless pair of Jump Boots. Collect what you need, then investigate the door control panel on the left.
"This panel requires a bypass to operate."
Well, it appears that you are locked in, so go instead to the back of the tall room. Behind a pillar, you will find a large lift. Press the button and ride the high-speed lift to the top.
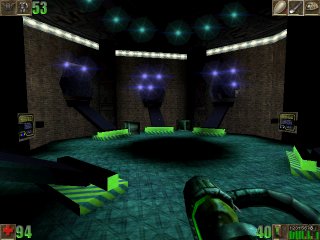
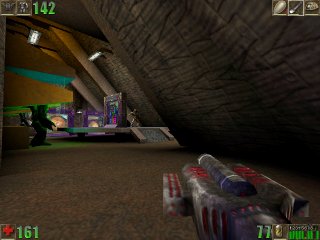
At the top of the lift shaft you will find yourself at a vantage point over a loft space, where a SkaarjScout is pacing between two information panels... kill it then enter the loftspace.
Your arrival in the loft space triggers another chain of SkaarjScouts who come out of access tubes at the side. The best tactic I found in this combat was to stand on the lift and flood 'em with blobs of Tarydium Sludge; the explosions confused them and they quickly died. However you do it, kill 'em all. When the Skaarj are dead, ramps will extend from the mouths of the five access tubes to the floor of the loftspace. You are now ready to explore.
Raid the crates on the floor to get a Flak Cannon and a box of 10 Flak Shells. Read the two information panels.
"Primary Shuttle Bay: Log Entry by Dockmaster Ivan Romanov Second Officer ISV-Kran. I have sealed the main Iris Hatch with a Laser welding team. No Alien Bastards are going to get into my shuttle bay."
"Primary Shuttle Bay: Log Entry by Dockmaster Ivan Romanov Second Officer ISV-Kran. The dock doors control panel can be reactivated with the override in one of the Access tubes."
So, going anticlockwise from the lift, visit the access tubes one by one.
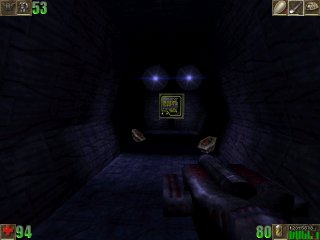
The first tube contains two useful Health Packs and an information panel.
"Main Engineering Has Been Sealed with a Containment Field. Containment Field Generator Must be Destroyed Prior to Accessing Engineering."
The second tube contains a Super Health Pack and your much sought-after override control panel.
"Main Shuttle Bay Door Override Controls"
The third tube contains a box of 50 Bullets. The fourth tube, two 25kg cans of Tarydium Sludge and another information panel.
"The first wave of Skaarj have been isolated within DECK4. I doubt they will be able to get through the ductwork and Enter the Main Ship. We will retreat to Deck1 and seal Engineering with a Containment Forcefield."
The final tube contains just an information panel.
"The Skaarj have infiltrated the Dock area. We will retreat to Deck1 and set up a makeshift high voltage barrier. We should be safe."
Time to return to deck 3 now, but don't take the lift; drop off the platform behind the ramp to the third access tube and you will land on a ledge with a wooden crate containing a highly useful Shield Belt. Collect, then drop to the floor. It's a long way down so expect to use about half your Shield Belt (unless you can use one of the wall lights as a half-way point when going down).
On the floor, activate the now functioning panel to open the bay doors. Return to the first room and find the lift back up to the balcony. Once back on the balcony, open the first of the two hatch doors with the appropriate button and go into the deck 3 corridors.
Now... this ring of corridors is patrolled by a pair of SkaarjWarriors. Flak Cannon at the ready, because you're going to meet them at some point.
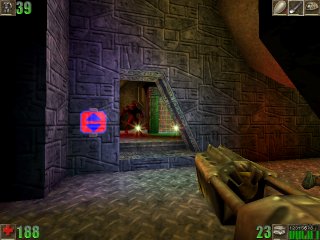
Your first port of call in here is a lift on the right marked "Engine power core control". Use the lift and you will see main engineering blocked by a force field. An information panel is nearby.
"MAIN ENGINEERING: EMERGENCY CONTAINMENT FIELD ACTIVE. CONTAINMENT FIELD GENERATOR GOLD CORES MUST BE DESTROYED BEFORE THIS FIELD WILL DISENGAGE."
Time to go exploring. Descend the lift and turn right, then go through the small doors ahead into another stretch of corridor. Follow the corridor as it goes round to the right then go through the doors on the left marked "Primary turbo-lift". You will be in a small chamber with a lift either side. Remember this, as this will be your exit later on. At the moment however the turbo-lifts won't function; an information panel explains it.
"PRIMARY TURBO-LIFT REQUIRES FULL ENGINE POWER."
Collect the Tarydium Sludge and raid wooden crates for Eightballs. Return to the corridor.
Right - time to disable the containment field. Look to the right, and you will see a large hatch-door marked "Containment field generator". Go through the door and follow the corridor beyond. At an opening to the right, you will see the corridor flooded by superheated engine coolant. A Toxin Suit won't protect you from this flood.
Read the information panel nearby:
"WARNING: ENGINE COOLANT OVERFLOW. COOLING SYSTEM EMERGENCY PUMP AND DRAIN VALVE MUST BE ACTIVATED PRIOR TO ENTERING THIS AREA."
Ok... so, return to the corridor via either hatch door. Go to the far end of whichever corridor you arrive in, and enter the hatch door marked "Cooling system control".
In this area you will find a SkaarjScout sleeping on the floor. Kill it, then follow the opening through to the next room, collecting a Stinger from a corpse on the way. You will be in cooling system control now; doors on either side are locked, so go through to the far end of the room via the gap where the large central pipe crossing the room curves up into the ceiling.
Go to the left and press the button to open the doors on this side. Nuke the SkaarjWarrior who attacks from inside then enter and read the large panel here.
"COOLING SYSTEM STATUS: COOLANT LEAKS IN CONTAINMENT CORE LOWER LEVEL. MANUAL INPUT BY UNAUTHORISED PERSONALE DENIED."
Go on into the room and collect the Health Packs at the far end. There's a Toxin Suit too but don't collect it yet. Operate the small panel here.
"COOLING SYSTEM EMERGENCY DRAIN VALVE ACTIVATED."
Leave this room and cross cooling system control. Use the button to open the door at the far side. Once again, kill the SkaarjWarrior within.
The large panel in this room reveals nothing, so go straight to the far end of the room and activate the small panel.
"COOLING SYSTEM EMERGENCY PUMP ACTIVATED."
Leave cooling systems now and go back across the ship to the containment field generator area. You should find that the flood has been removed; the information panel has changed:
"ENGINE COOLANT EMERGENCY PUMPS ACTIVE. CONTAINMENT FIELD SYSTEMS BEING REROUTED BY ALIEN INTRUDERS."
Go through the formerly flooded corridor and through the doors to at the far end. There is a SkaarjScout on patrol in the next large area, so ready your ASMD Combo skills and kill it when you spot it (or it spots you). Go round to the right and collect the two ASMD Cores from behind a large information panel. Read the panel.
"ISV-KRAN ENGINE STATUSOFFLINE. DAMAGE REPORT MINIMAL. LIFE SUPPORT SYSTEMS ONLINE. DECK 1 POWER LEVELS FULL. SHIP'S HULL BREACHED AT OBSERVATION LOUNGE."
Go back into the main body of the room and climb the steps on to the raised platform in the middle. From here you can jump on to crates on the right to retrieve a can of 12 Eightballs and a 25kg can of Tarydium Sludge. Collect what you need, then go further through the room to read the next panel.
"CONTAINMENT FIELD GENERATOR ONLINE. GOLD POWER CORES UNSTABLE DUE TO EXCESS STRAIN FROM SEALING ENGINEERING. MAIN ENGINEERING CONTAINMENT FORCEFIELDS MAY BE DISABLED BY DESTROYING GOLD CORES."
Now... at this end of the room are some large doors. Press the nearby button and they slowly open, and you can go through to arrive in a lift shaft. This lift goes down two levels, so when you ride it down be sure that you get off at the first stop.
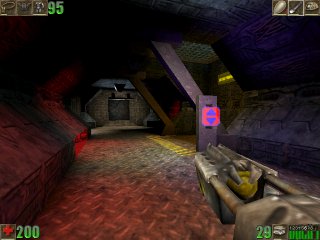
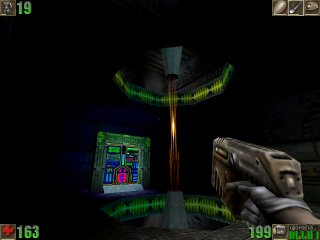
From the first stop, walk through the corridor in this area and you will be on piping overlooking a large zappy generator.
From here you will see a SkaarjScout sitting on the floor below. Dispose of it from your vantage point. You will also probably see a SkaarjWarrior walk past beyond the corridor directly ahead; kill that too.
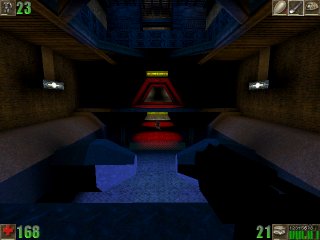
Follow the piping round and go through the corridor at the far end. Go left and follow the walkway you arrive on round until you see a shimmery gold beam surrounded by a force field. Go past the force field and operate the panel behind briefly. It will activate with the following message.
"WARNING: CONTAINMENT CORE EXPOSED: THIS CORE IS HIGHLY EXPLOSIVESTAND BACK BEFORE DISCHARGING WEAPONS."
The force field around the gold core has dropped, so go back to the metal walkway at the corner, turn round and fire your Automag at the core. The core will detonate with a powerful explosion that shakes the ship. When you're done shaking, follow the walkway round to the other side and repeat the sequence to destroy the other gold core.
Return now to the junction of the walkways and drop down to the walkway below - mind the SkaarjWarrior on patrol here. Read the information panel nearby.
"WARNING: ENGINE COOLANT LEAK ON LOWERMOST FLOOR OF THIS AREA."
Well, the engine coolant leak is probably worth investigating. So, you need to go back and get that Toxin Suit you left all the way back in cooling system control. Argh.
So, climb the ramp and follow the corridor towards the blue zappy generator. Walk beneath the zappy bit - you'll be fine as long as you don't jump - and go through to the lift shaft at the far end. Collect the two ASMD Cores here, then press the button to call the lift. Ride it all the way to the top and open the doors.
You can find your own way from here; cross the ship and enter cooling systems control. Enter the room on the left and collect the Toxin Suit from behind the far pillar. When you're done, return to the coolant leak in the containment field generator area.
Drop into the gunge and go through the opening in the wall to a low-ceilinged area. A SkaarjScout guards some corpses here; kill the Skaarj then read the information panel nearby.
"CONTAINMENT ENERGY CORES EXTREMELY VOLATILE: ALL WEAPONS MUST BE PLACED ON SAFETY."
There's a lift at the far side of this area; ride it up and collect the Assault Vest in the ducting at the top, then turn left on to the uppermost level of the lower generator area. While the area above the core to the left is empty, the area above the other cores has 4 Health Packs for your attention.
Anyway, you've cleared this area, so where now? Main engineering should be accessible now, so use your knowledge of the ship to return to the main corridors. Turn right in the corridors to so that you arrive at the main engineering lift. Go up the lift, and you will see that the force field has gone and the information panel has changed.
"MAIN ENGINEERING: INTRUDERS DETECTED PROCEED WITH CAUTION."
At this juncture you will probably be seen by a SkaarjGunner armed with a Dispersion Pistol operating the consoles within. Kill it, then enter engineering yourself.
The first console has two ASMD Cores behind it. Collect then read the information.
"ISV-KRAN DECK 3 STATUS: ENGINE SYSTEMS ATTEMPTING TO BE RE-ROUTED BY UNKNOWN INTRUDERS. ENGINE POWER CAPACITY AT 75%."
Proceed clockwise round the ground floor of the engineering area (ignore all doors and lifts for now). At the far end you will find a SkaarhWarrior at another console. Kill the Skaarj and read the console.
"MAIN ENGINEERING DIAGNOSTIC PANEL: 75% ENGINE POWER AVAILABLE. COOLANT LEAK IN CONTAINMENT CORE GENERATOR AREA LOCALISED. LAST ATTEMPT TO REROUTE POWER UNSUCCESSFUL."
Go round and read the third panel.
"PLANET SCANNING STATION. ALIEN STARSHIP DETECTED ENTERING AND EXITING THE ATMOSPHERE. ALIEN MOTHERSHIP LANDED IN NORTHERN VALLEY NEAR ATMOSPHERIC ELECTRICAL STORMS."
Go back round and through the door behind the first panel. There is a lift here; a crate on the floor contains Jump Boots; DON'T collect them yet. Instead, collect the box of 50 Bullets and the Tarydium Shards from wooden crates atop the lift then ride it up to the balconies above engineering.
On the balcony, collect the two 25kg cans of Tarydium Sludge, then go to the far end and open wooden crates to get 40 more Tarydium Shards and a can of 12 Eightballs.
There is a corridor to the left here. Follow it round into another room where a SkaarjTrooper armed with a Dispersion Pistol is on guard.
This room contains two mechanical Biosuits and three panels. Read the first panel on the raised platform in the middle.
"BIOSUIT CONTROL STATION: SYSTEM FAILURE: POWER IS BEING REROUTED BY INTRUDERS ON DECK 1."
Drop to the floor and read the two other panels.
"SCANNING STATION 1: Short range surface scans indicate location of large Alien spacecraft on the planet surface that matches the description of the same ship viewed entering and leaving the planet's Tarydium Field's prior to orbital decay."
"SCANNING STATION 2: Surface scan indicates indigenous primitive structures on the planet surface. A higher technology town detected on a rock suspended in the sky by some unknown force. Huge power sources emanating from an obelisk within this town."
Go behind scanning station 2 and collect the Shield Belt hidden there. Then, return to main engineering. If you look about, you will see high platforms with wooden crates on. On this side of engineering, a crate contains a Super Health Pack. On the other side, there are two crates each with a can of 12 Eightballs.
Go and get the Jump Boots from the bottom of the balcony lift then go for the Super Health Pack. You may run out in jumping to the Super Health Pack, if not then go for the Eightballs when you reach the other balcony.
To get to the other balcony, drop down to the floor and find the lift on the other side. Summon it with the button then ride it up. Go to the far end of this balcony, then round into the next room.

Kill the SkaarjWarrior here then take a look around. Three power cells are waiting to be loaded, although one is broken. Go into the loading tube of the broken one to collect two ASMD Cores. Operate the two panels here to load the two functioning power cells. When both cells are installed, there will be a shake as the engine starts up.
Now that the engines are working, the primary turbo-lift should work. Return to the balcony and drop down to the ground floor - but make sure you don't fry yourself in the energy beams. It's easiest at the far end of the balcony.
Leave engineering. Take the lift down but beware the three SkaarjTroopers with Dispersion Pistols who have appeared. Run for the turbo-lift room at the far end of the corridors. Within the turbo-lift room, the information panel has changed.
"PRIMARY TURBO LIFT POWER RESTORED - WARNING A 2 SECOND DELAY FOR LOADING IS IN EFFECT"
Press one of the buttons and step on to the appropriate lift. Shortly, it will rise at speed to the top of the shaft. Step on to the walkway at the top and go through the door to one side to exit the level.
Next level walkthrough
ISV-Kran Deck 1
Return to main menu
Walkthroughs
Printable version of
ISV-Kran Decks 3 and 2